Tuesday, December 6, 2022

Corjl Update


Since my last post I have decided to cancel my membership with Corjl and find something else to do with my collection of digital items. I'm not sure if the market is oversaturated or if my SEO needs work (or both) but not only did I not sell anything, my items didn't get any traffic. So I'm going to turn my focus to other projects for the time being. 

I recently got a new sewing machine so I think I may do a review. This is going to be a short post, but I am planning on being more active in the coming year, and hopefully have more physical products listed on my Etsy shop.

Tuesday, November 8, 2022

Making Invitatons with Corjl


-This is not a sponsored post.


I am a collector, I'm not sure if a lot other crafty people are, but as someone with (undiagnosed) ADHD I think it's one of my quirks. I like to collect craft supplies and that includes clip art. I have folders upon folders of clip art and I had really, nothing to do with them, well, now I do. I've started working with Corjl, and if you've ever purchased an editable item on Etsy you've probably seen listings with it before. I had used it a few times to make my kids their party invites and I didn't have any issues with the process. 

Right now (as of November 2022) They are offering a 2 week free trial if you want to make some designs and give it a whirl. I have my designs tied to my Etsy store, but you can also use Shopify. When you sign up you are given access to a digital folder with lots of resources for your store listings, as well as logos.

I am going to give a very simple overview of how it works. When you open your seller account you can choose to start a new design. Once you choose your size parameters you can start the design process. Upload your images (make sure you have the proper licenses) and  you can drag and drop your images into the artboard and make it look how you want. You can go to the fonts tab and choose the fonts they have available or you can subscribe to their Creative Fabrica font package. If you already have a CF subscription, you can't link them, I tried. 

After your design is how you want it you need to download a copy to use in your listings. Once you do this you need to create a listing in Corjl to match up to the listing in your Shop. OH! one thing I forgot to mention was you get a DEMO of your product! Your customer can try it out and see if it works for them before purchasing, and then they can purchase right from the demo. Your demo link is on the Listing page for that particular item. I recommend trying everything out first before you publish your listing on your shop. You also attach your etsy (or shopify) listing number, to the listing in Corjl. It sounds like a lot, but honestly it's not too bad once you get used to the interface.

That's the jist of it, honestly there's a bit more to cover but if you have a ton of graphics like I do and have no idea what to do with them, this is a good way to use them and make passive income. If you give Corjl a try, let me know what you think!


Here are some birthday invites I made up using the graphics I hoard and Corjl.


You can click on my Etsy button on the right of the blog to find the invites if you're interested in purchasing. 

Enjoy!

Monday, January 17, 2022

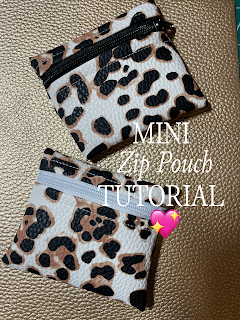
Mini Faux Leather Zip Pouch Tutorial


 If you're looking for a super fast, easy zipper pouch to make I have the perfect one for you right here on the blog. With these I am using faux leather so there is no need for interfacing, however if you decide to use cotton fabric you can easily add some fusible interfacing and follow the same pattern.


For these pouches I have made them in mini sizes but if you want to size them up for a larger pouch the steps are the same.

All you need is 

1 piece of faux leather (mine is 4"x6")

The best patterns for this are ones that have allover or multidirectional patterns, if not your pattern will end upside down on one side.


1 craft zipper

Wonder Clips (you really don't even need them) 

That is it

Step 1:

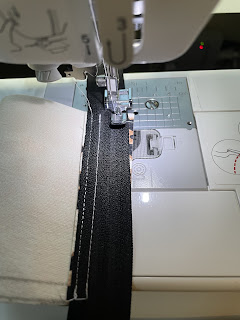
With your faux leather pretty side up, put your zipper tape face down and sew together using your zipper foot.


Step 2:

Turn your project over and finger press the zipper and faux leather open. Topstitch down the entire length of the pouch


Step 3:

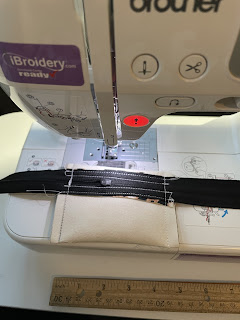
Fold the other raw edge up to your zipper tape and repeat step 1


Step 4:

Open your zipper to turn the project right side out, topstitch down.


Step 5:

Zip back up but leave the zipper pull within the barriers of your project! If not you'll have a non working bag!
Leaving about 1/4" at the top of the bag, make sure your zipper tape is together and sew up both sides.
(If you are making a larger pouch you can leave about 1"-1 1/2" space at the top.


Step 6:


Trim excess zipper from both sides, if you want to and have a lighter on hand you can quickly seal the edges where you cut the zipper tape.


Step 7:

Turn project right side out through the zipper and poke out your corners. 

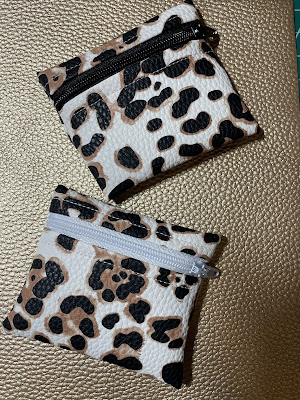
You are done!

So simple, so cute! I love to play around with different leather/zipper combinations.


Happy Sewing!